Epdm flashing tape with a butyl adhesive backing will help.
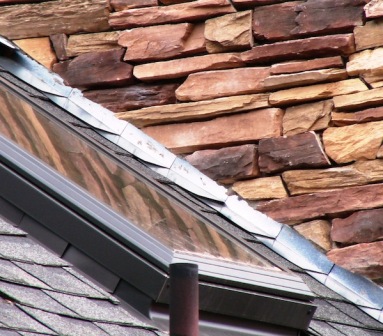
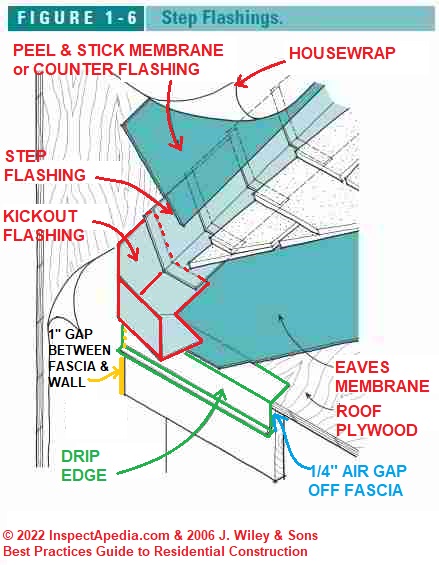
Step flashing roof wall connection.
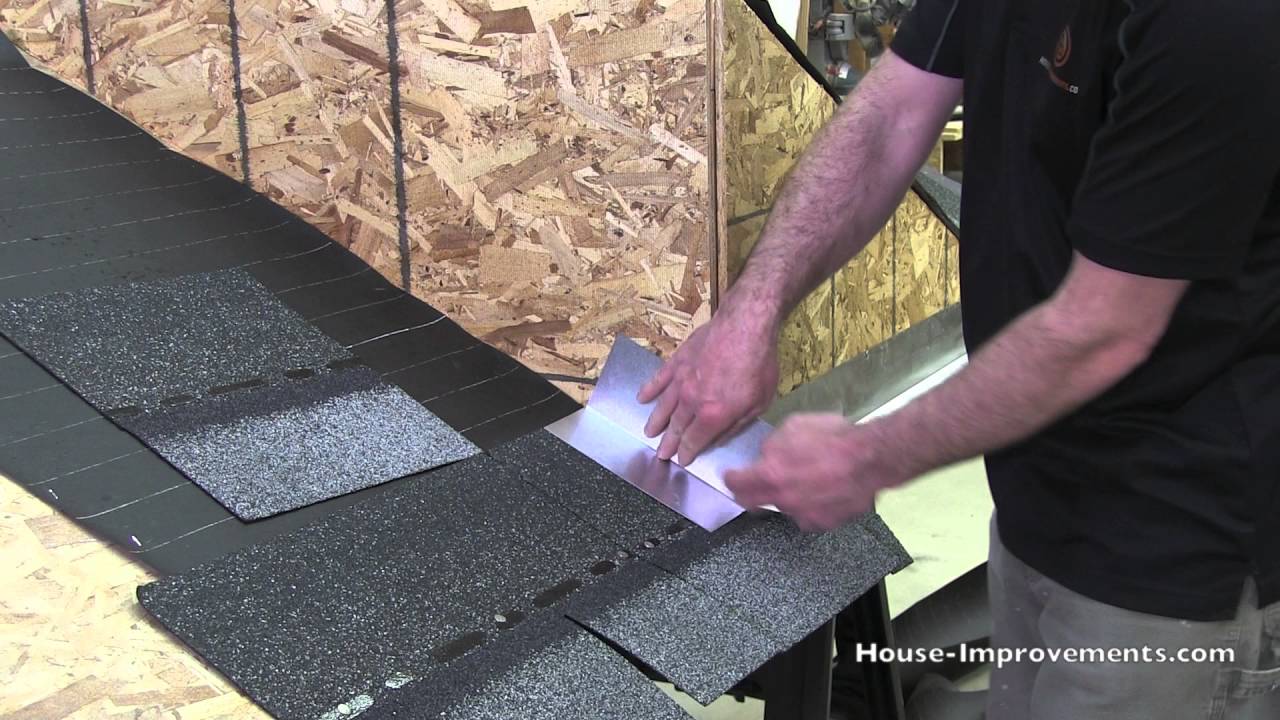
Here s how to install it correctly.
Vent flashing done right to prevent leaks back up roof vent boots with flashing counterflashing and proper shingling.
Longer than the shingle s exposure.
How to install step flashing with a wall corner step three.
Step flashing step flashing redirects the water back onto the shingle.
Cut step flashing pieces to be 10 in.
2 fold a vertical strip into the inside corner extending it above the top of the block so that the next layer of flashing will cover it shingle style.
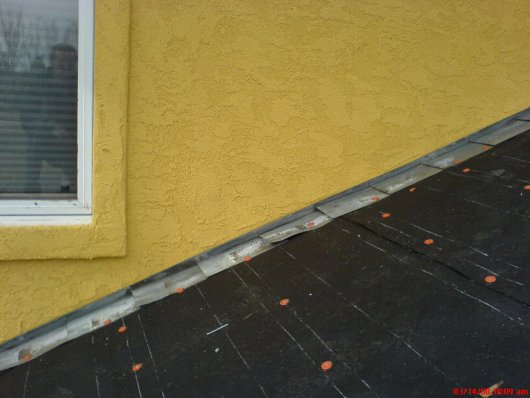
Step flashing is used to provide a water tight connection where roofing adjoins a vertical juncture.
Keep doing this until you run out of stepped blocks.
1 run membrane down the side of the block and onto the roof underlayment.
Hammer one nail to the.
Step flashing should be extended at least 4 inches up the wall from the roof deck and at least 4 inches out along the roof deck 2015 international residential code irc.
Even if one piece of step flashing fails the flashing and shingle below it start the process over again.
The metal flashing is formed with a hook edge and cleated on 12 centers.
Installing step flashing to prevent roof leaks step flashing spans the joint between roof shingles and an adjacent side wall.
Bent into an l shape.
Bend it back so that it overlaps the corner flashing.
And 3 cap the block with membrane overlapping the first two pieces and bridging the gap between the block and the wall sheathing.
The flashing extends up the wall at least 4.
Cover tops of step.
Nail through flashing into shingle do not extend flashing above top of shingle and.
Ensure it sits flat and extends at least 8 inches above the shingles.
The flashing extends onto the roof a minimum of 2 inches 4 inches is preferable in more severe climate areas.
Galvanized sheet metal bent at a 90 degree angle i e.
Nail flashing to roof deck only.
This flashing is typically field fabricated from a sheet of 26 ga.
Flashing joints are lapped 6 in the direction of water flow.
Nail it in place with two nails one.
Continuous flashing against a sidewall is one way to install a roof but it s not the correct way.
Here s how to do it right the first time.
Wide and 2 in.
Then set the piece down.